|
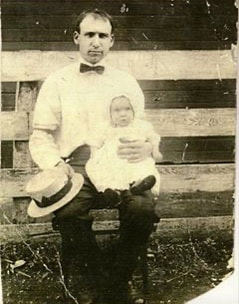
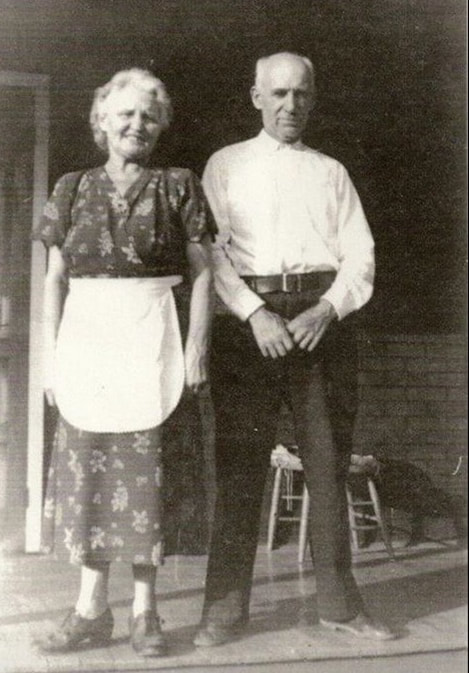
Earlier this year I was invited to create a portrait for an ongoing, international collaborative mosaic installation at The Ruins Project in Western Pennsylvania. The project, located on the Great Allegheney Passage, at an abandoned coal mine site, celebrates the rich history of the coal mining industry. My subject, John Moskal, was born in 1887 in Poland, and immigrated to the United States in 1907. He joined other family members who already lived in Whittsett PA and began working in the coal mines. He, and other members of his family, worked in the mines, until it shut down in 1946. This small black and white photo is the only one I received of him with a horse, to use as my reference. Definitely a challenge! 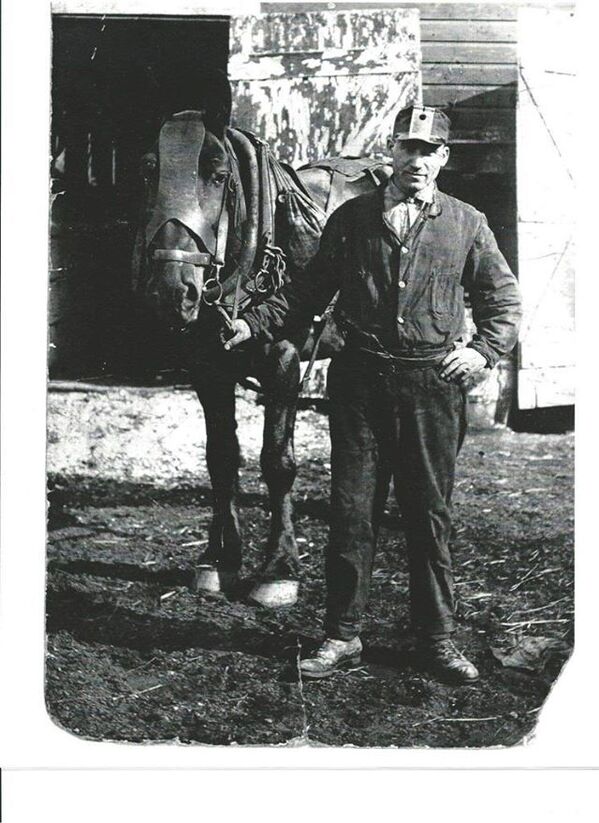 These are a couple other photos of a younger John with his daughter & later in life with his wife, Kathryn.
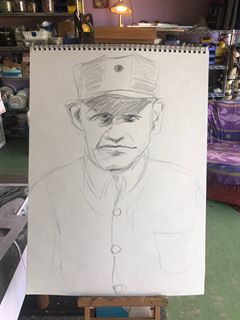
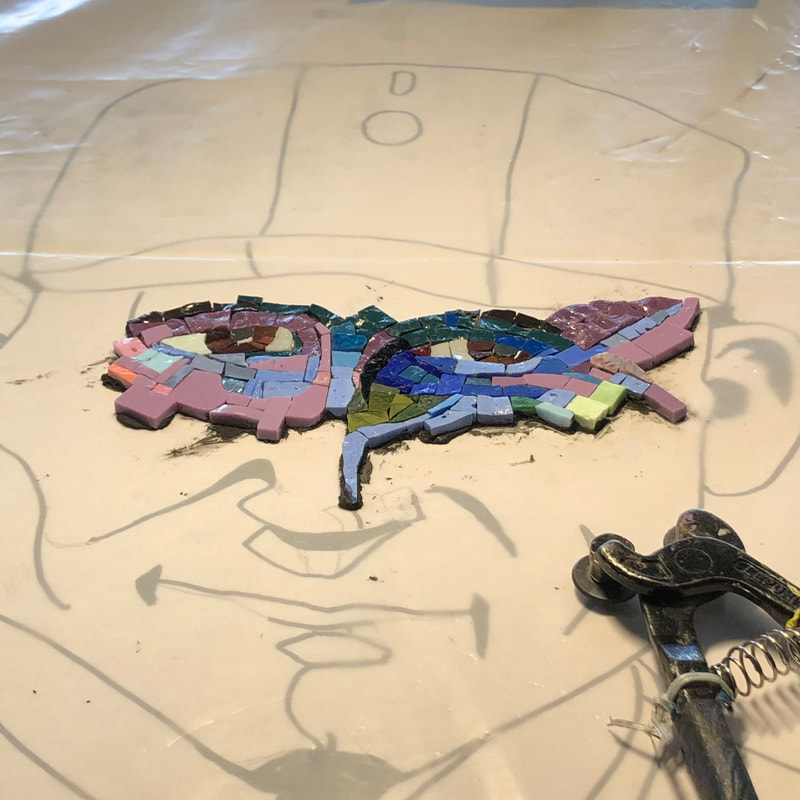
I began by drawing several freehand sketches, coming up with a simple "cartoon" from which to begin the mosaic work.
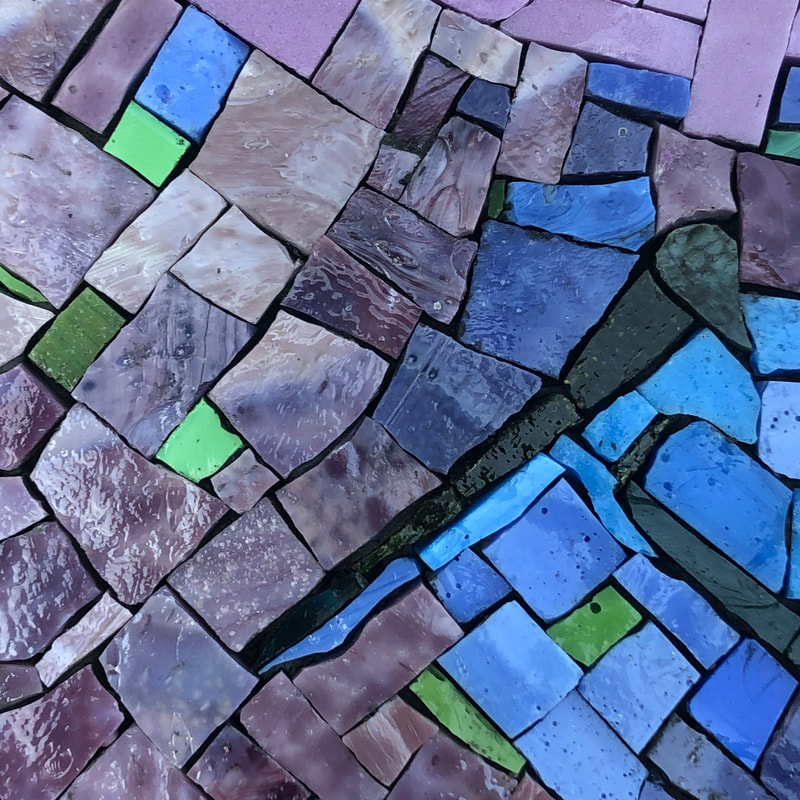
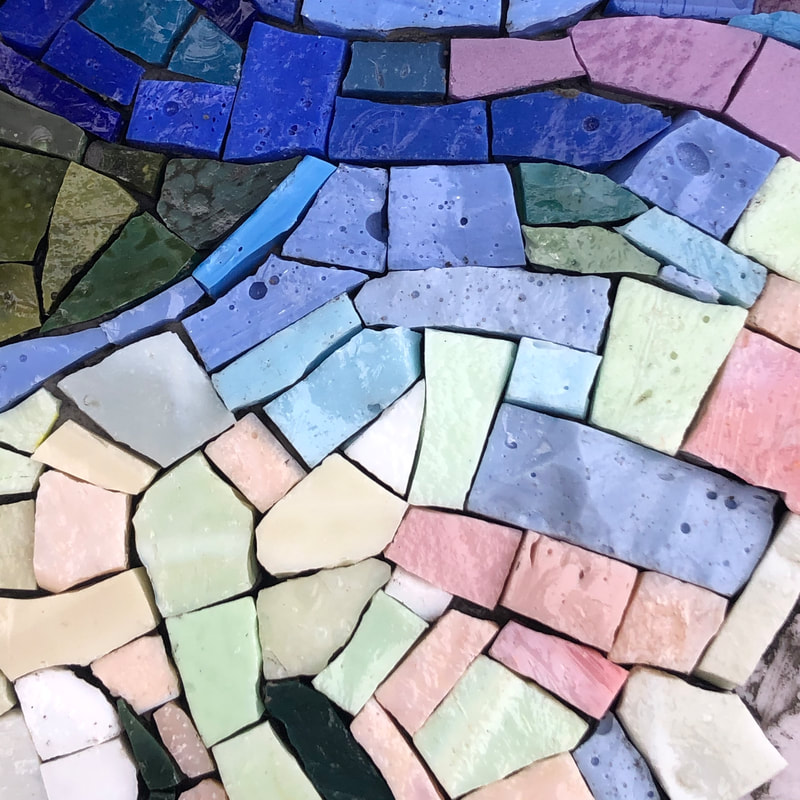
details of the work & color pallet
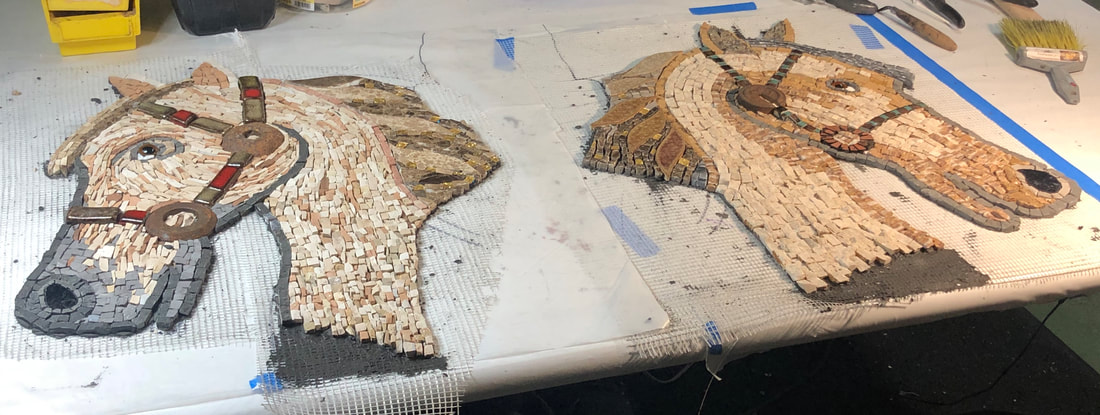
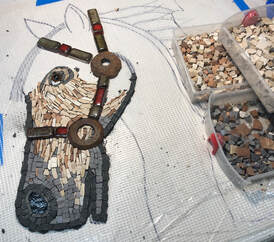
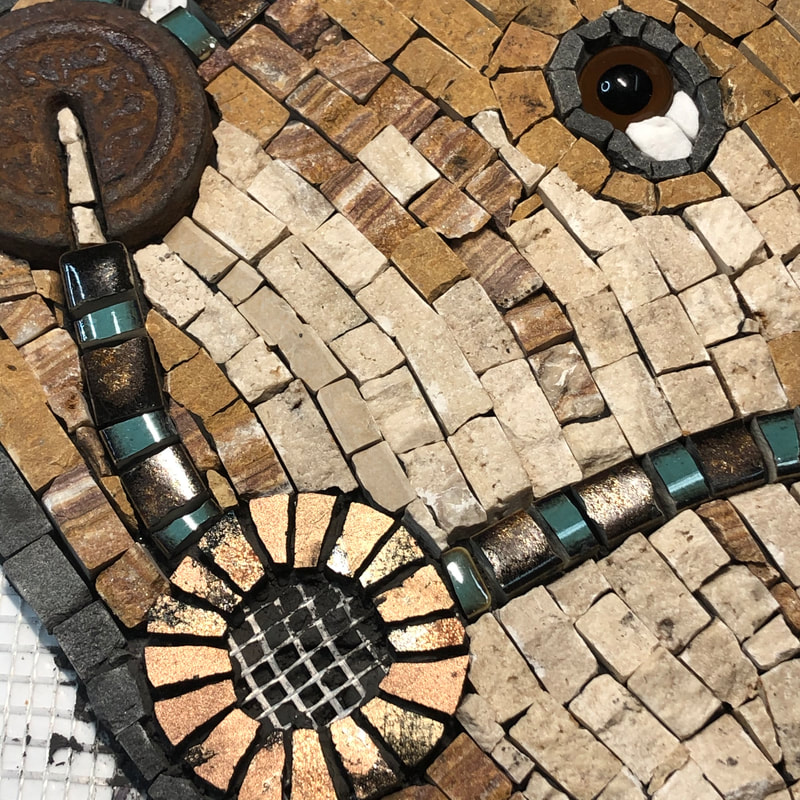
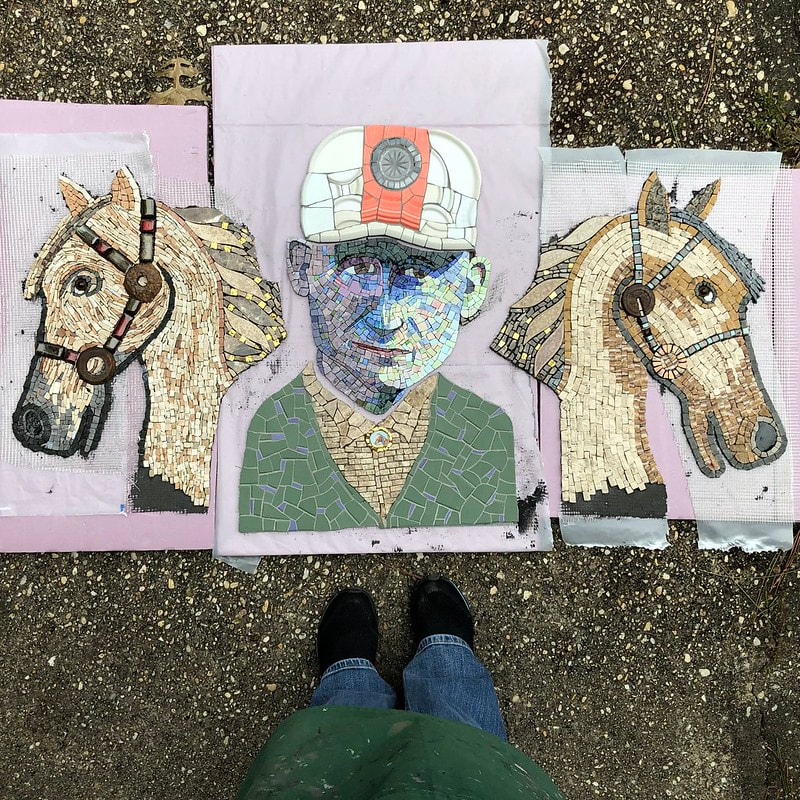
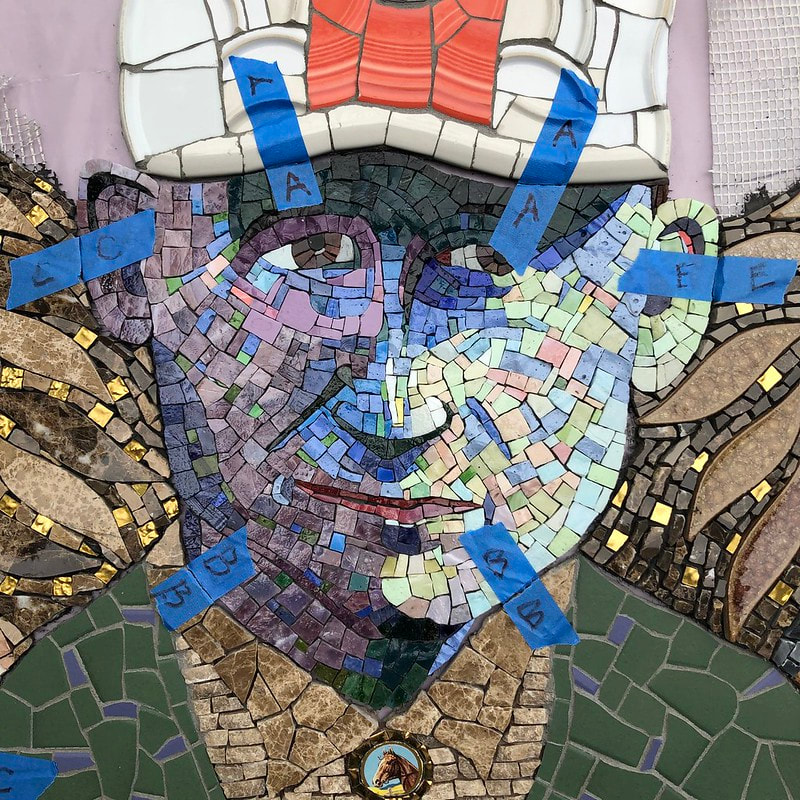
For his face I used Italian, Mexican & Chinese Smalti. I started with the eyes, and worked outwards from there. 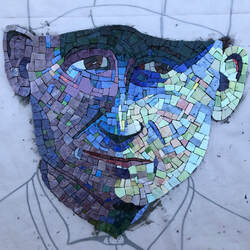 Next I moved on to creating his hat, altering the cap from the original image into a hard hat. I used the bottom of a crystal glass to represent the the miner's light. Ceramic & crockery shards were used for the remainder of the hat. I love the texture & interest that the crockery rims creates. 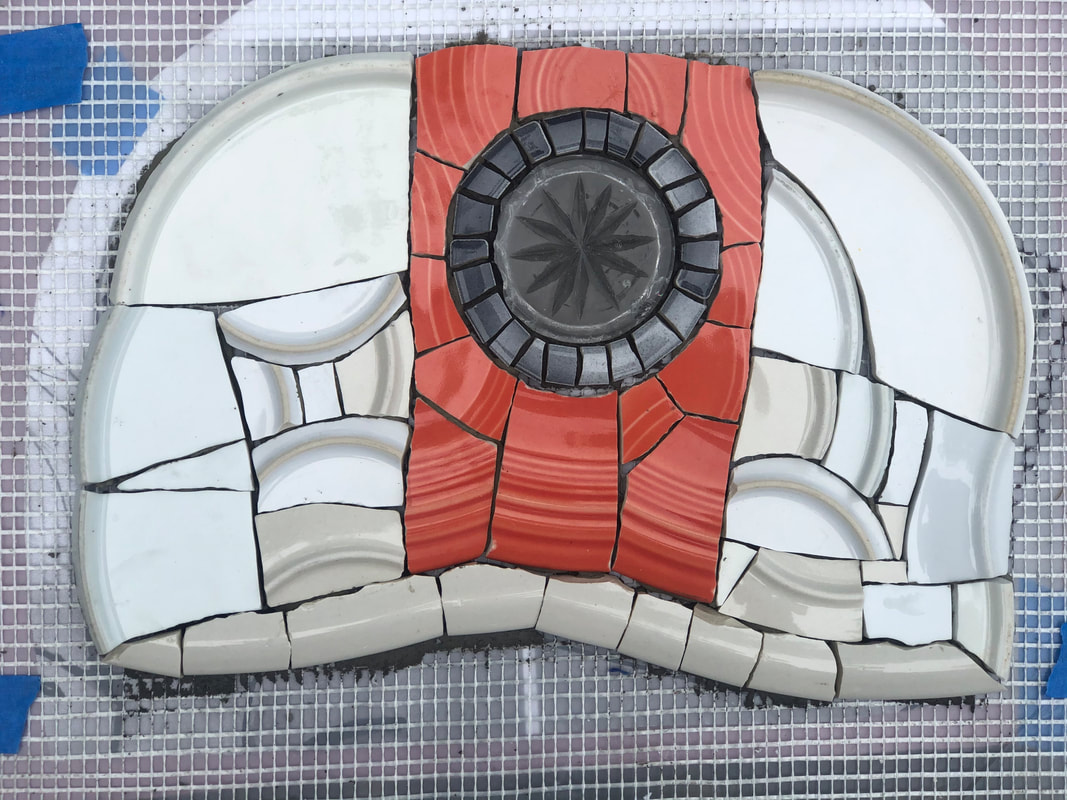 Next came his shirt & sweater, using a combination of marble and unglazed porcelain, to create additional textural contrast. I was delighted to find this horse image, in my stash of dishes, to button up his shirt. 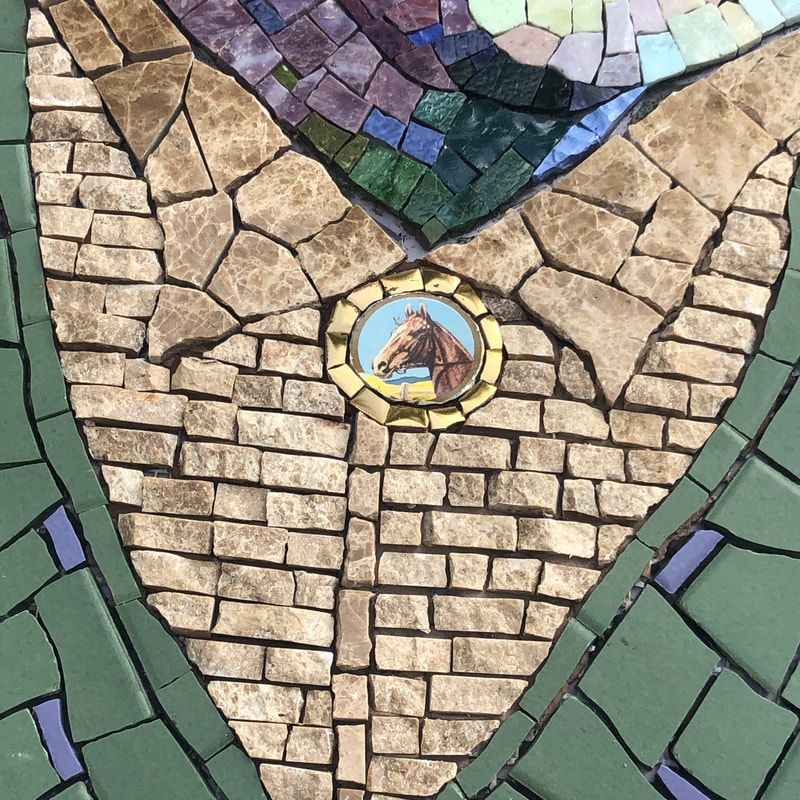 Next came the all important horses, flanking the portrait/ Again starting with simplified drawing as my guide. 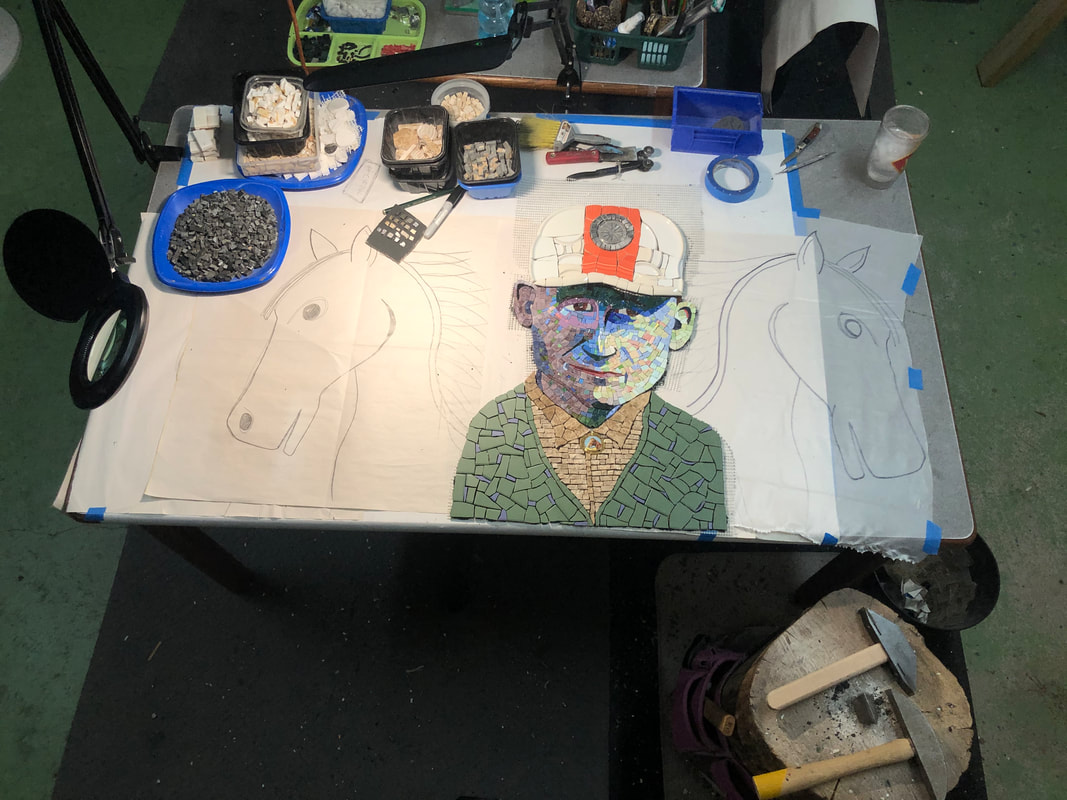 I felt the need to use some metal pieces for the horses' bridles. I was thrilled when Rachel, the proprietor and creative genius behind The Ruins , found & sent me a few wonderful rusty bits (below) that were scavenged at The Ruins. Equally fun, was finding a way to incorporate them into the mosaic. 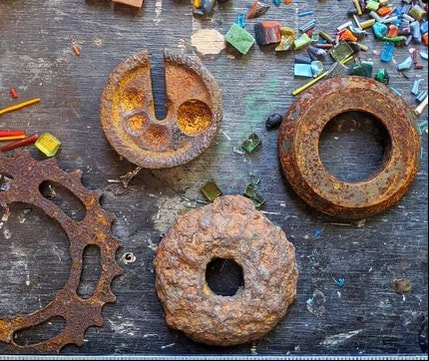 Rachel sent 3 small rusty circles, but I needed one more. I created a 4th, faux rusty ring, using metallic Mexican Smalti. The horses themselves are all marble and stone, cut by hand with the traditional hammer & hardie. I also found glass taxidermy eyes in my stash, which give them a realistic look. One in particular, is forever staring back at the viewer!
 Once the horses were complete, I moved on to grouting the hat & sweater sections.
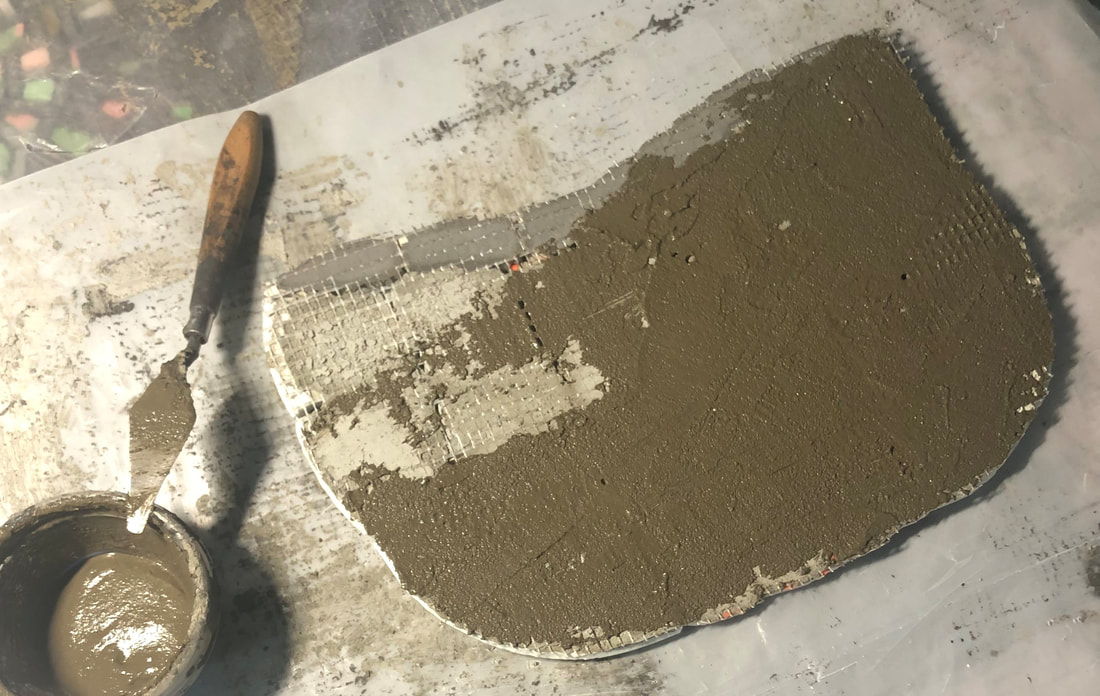
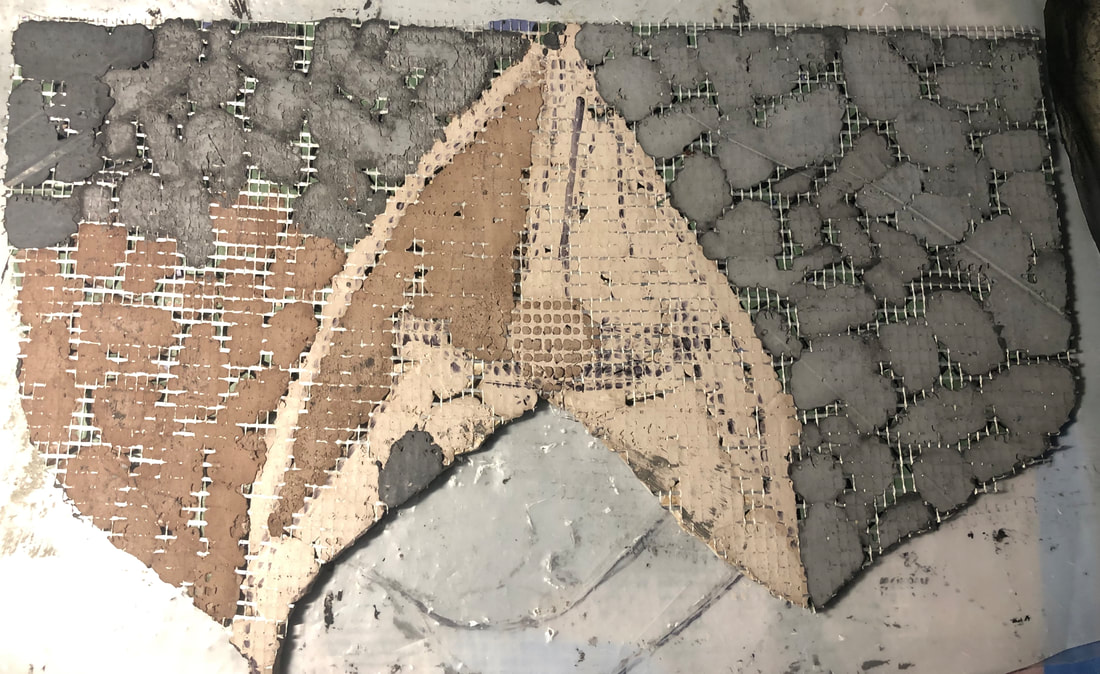
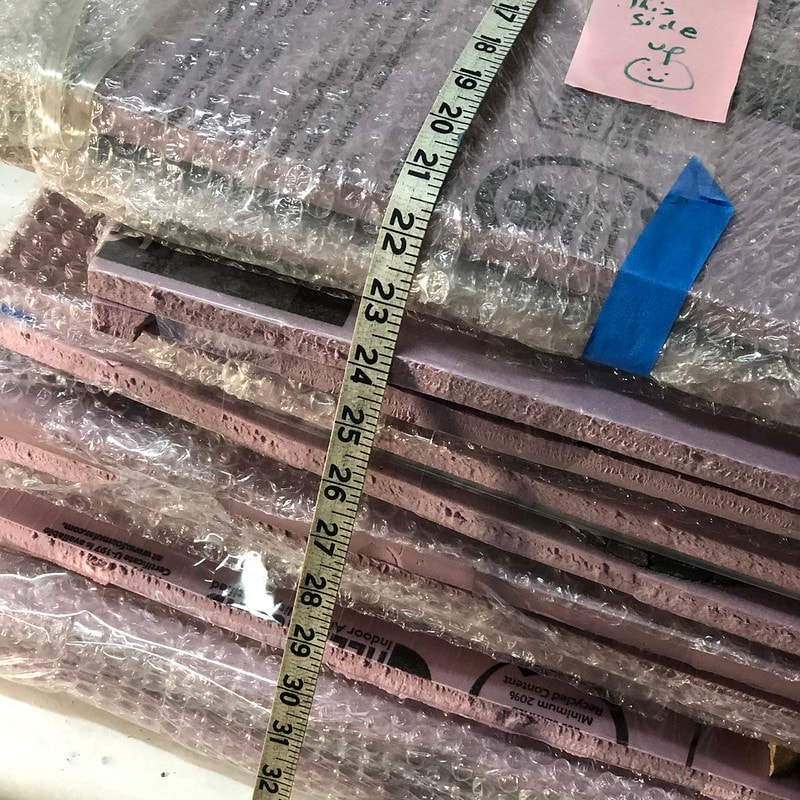
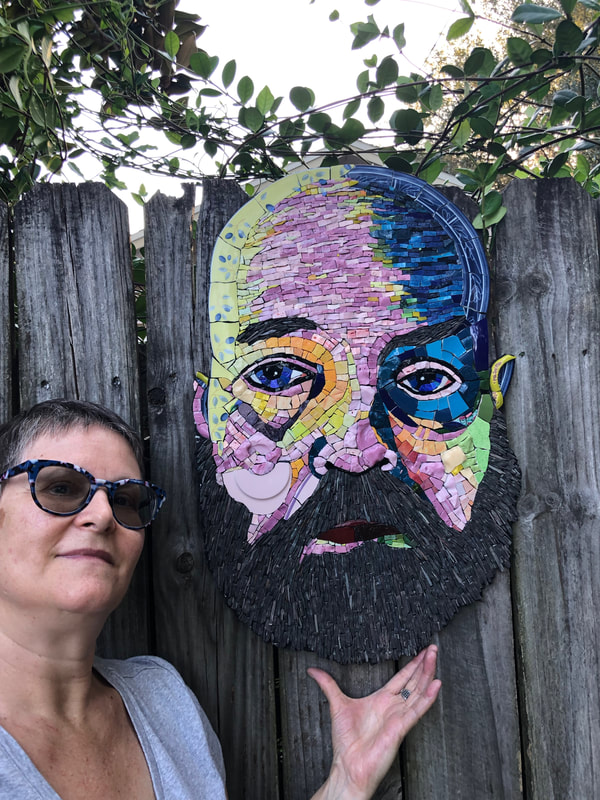
The portrait of John Moskal, Master of Horse, complete & pieced together! 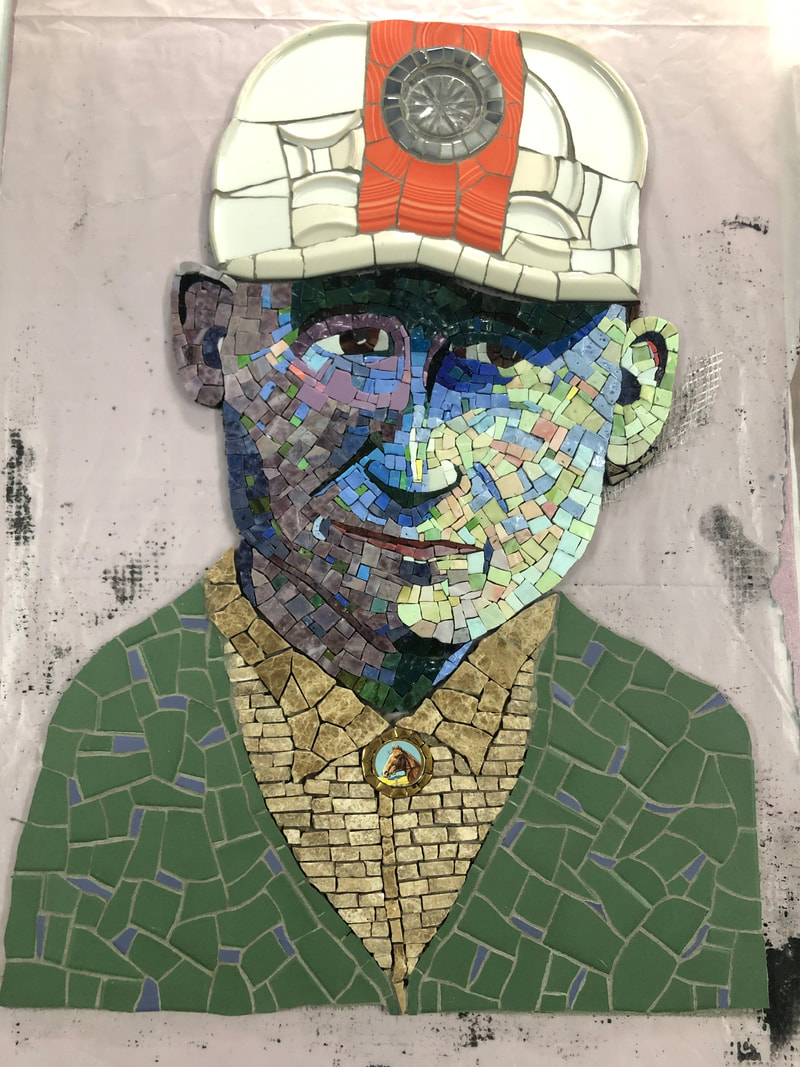 It was my intention to visit The Ruins in early September to install the work myself, but due to the ongoing pandemic situation, alternate plans have been made. The mosaic will be shipped to The Ruins & installed by Rachel, before the cold sets in! To get ready for shipping, I laid out all the pieces, taped & marked them for installation alignment, and wrapped each section for safe shipping.
Next time we see Mr Maskal, he'll be part of The Ruins Project landscape! Thank you Rachel for inviting me to be a small part of your larger vision. It's an honor to hang with the ever growing international list of artists whose work is already, and has yet to be, installed there! I anxiously await what comes next & being able to visit in person! 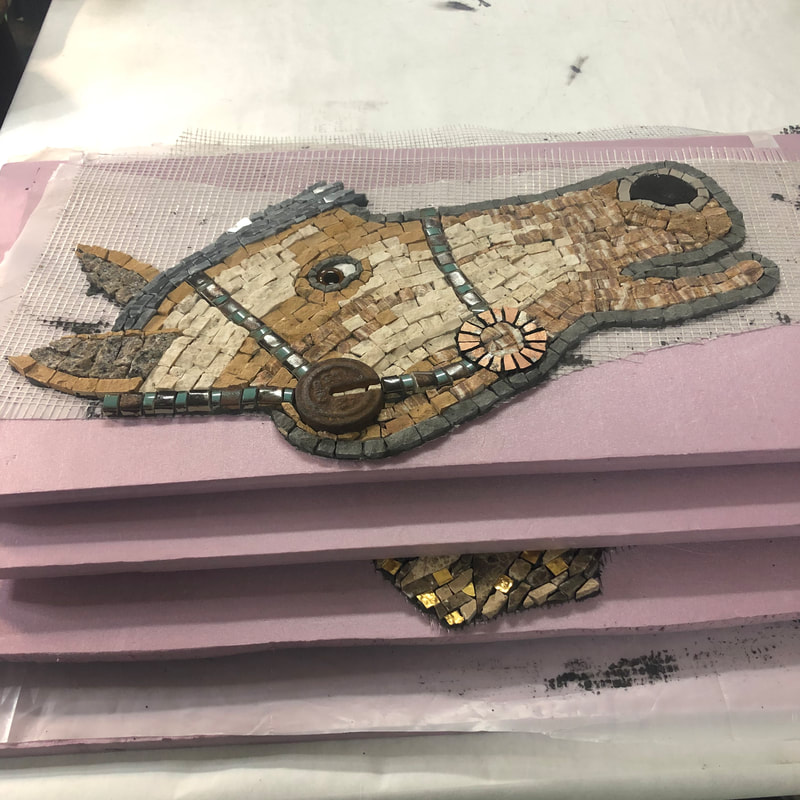 Bon Voyage!
6 Comments
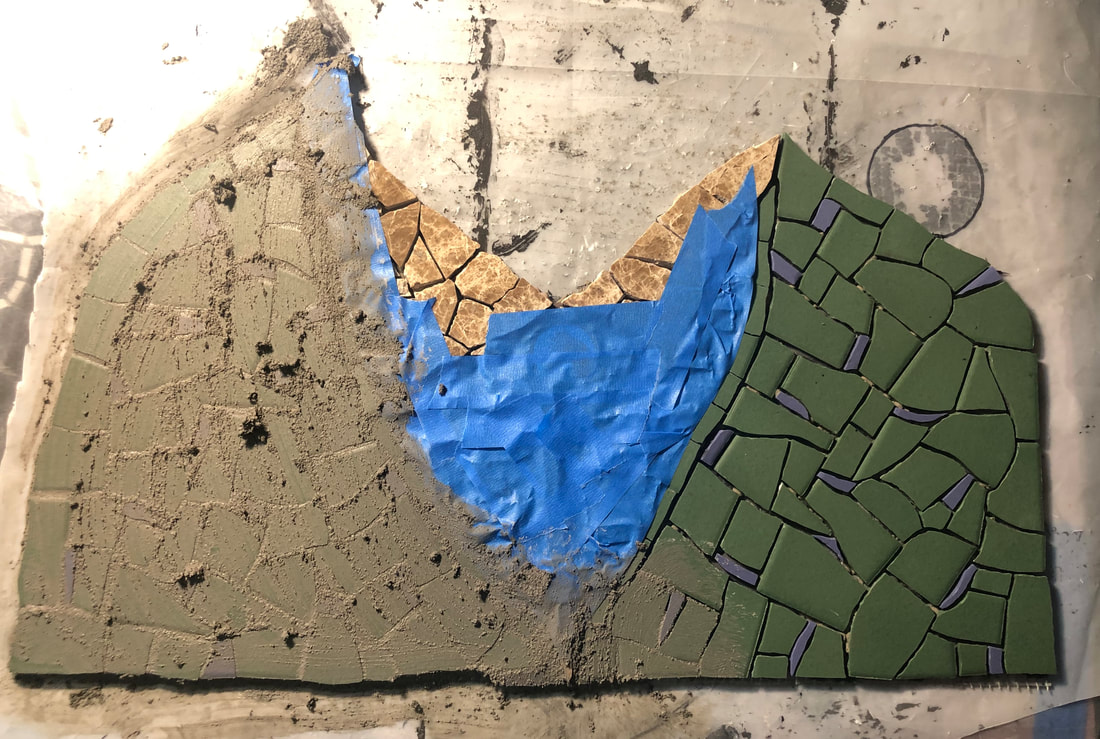
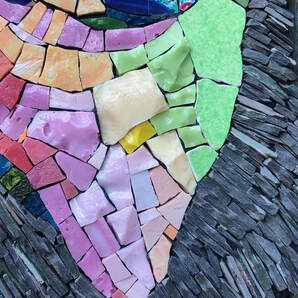
What I'm working on now has become a meditative process. Moving intuitively from the center outwards, I set up one simple rule, to form a border, in grey scale, around each piece. Beyond that, I'm enjoying making choices piece by piece. With minimal cutting, the chunks remain, for the most part, in their organic form, juxtaposed with the very regular straight lines of the manufactured border tiles. The idea for this piece came as a direct outgrowth of the series of small works I created just before starting this work. See - Etude series 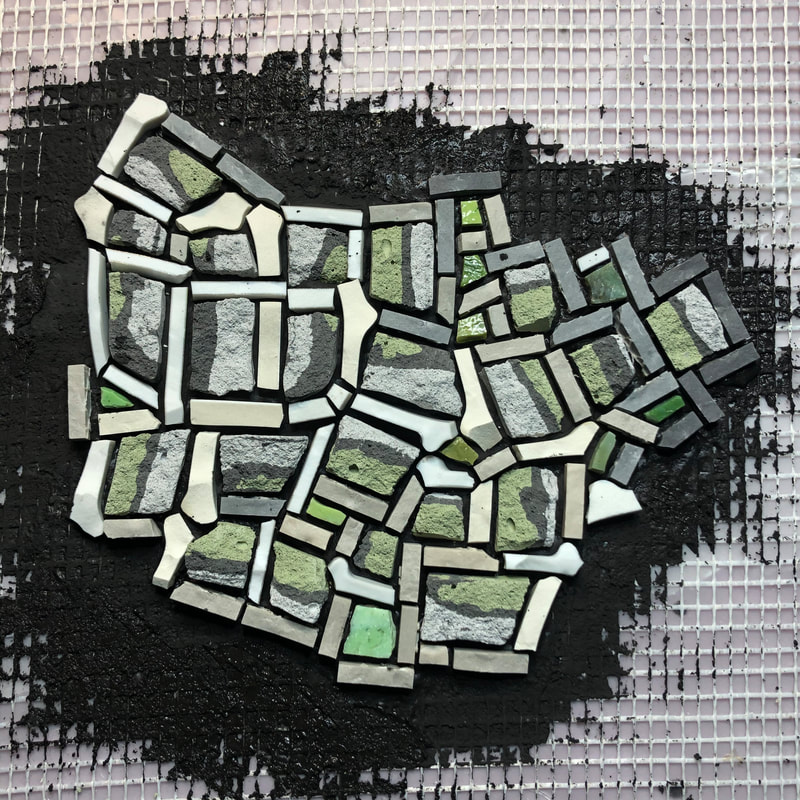 The predominant material is home-made "rocks", which I created a couple years ago, with variously tinted mortars. Once they are fully cured, I cut them with a hammer & hardie into smaller workable pieces. For the most part I am using the riven edges, which exposes the color & provides textural interest. 
Want to learn how to create your own mortar tesserae? I suggest you check out Julie Sperling's online course. A bit more explanation, show & tell, directly from my work table. Apologies for the clunkiness of my video editing, as I attempt to climb that learning curve! & a little peak at that transition beginning... 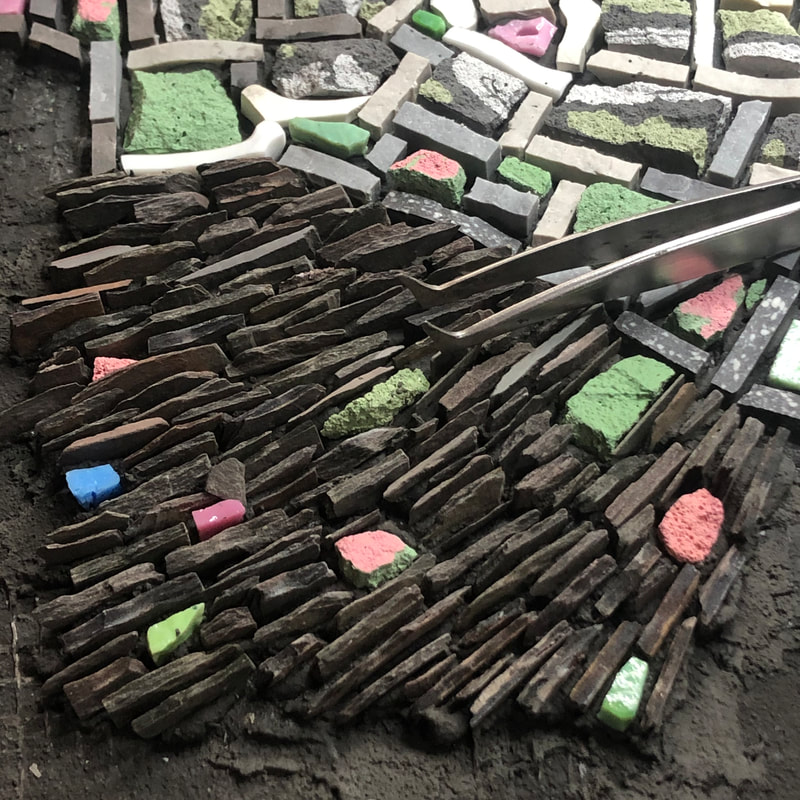 Thanks for stopping by.
let me know you were here, by leaving your thoughts in the comments. Until next time..... ciao!
My materials were a variety of colorful Italian & Mexican smalti, including some luscious large riven chunks which I love, dishes, and slate.
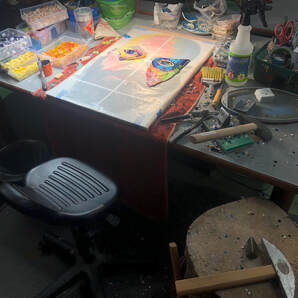
Once I finished laying all the tesserae, the real experimentation began. Flipping the work & reverse engineering a hangable substrate. Here's a time lapse of that process.... & Tada! 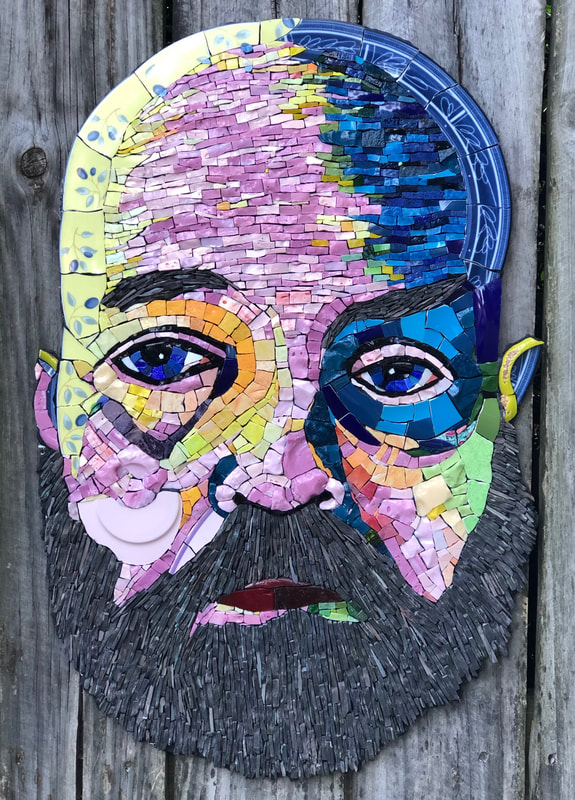
|
ArtistGila Rayberg 
Archives
November 2022
Categories
All
|


 RSS Feed
|
|

|
email: [email protected]
|
All content ©Gila Rayberg
|